Bring plant science to life with a real tulip, a simple growth graph, flower-part observations, and a tulip life cycle printable.
(With free tulip coloring pages)
Spring is a wonderful time to help students notice how living things change. A tulip growing in a school garden or classroom gives third graders a real plant to observe—from the first green shoot to leaves, a flower bud, and a bloom.
This investigation combines life science with measurement, graphing, scientific drawing, and writing. Students do more than study a life cycle diagram: they make predictions, collect observations over time, and use evidence to explain how a tulip grows.

Why Tulips Work Well for Elementary Science
Tulips make plant growth visible. Students can observe structures above and below the soil, track changes from week to week, and connect a living plant to a life cycle model. A tulip also opens the door to questions about what roots, leaves, stems, bulbs, and flowers do.
A simplified sequence students can model is:
Bulb → roots and shoot → leaves → flower bud → flower → seeds and/or new bulbs
The exact timing varies, and not every stage will appear during a short classroom study. That is useful, too: students can compare their own observations with photographs, diagrams, or a printable model.
Learning Goals
By the end of the investigation, students will be able to:
- Observe and describe changes in a growing tulip.
- Measure and record plant height over time.
- Organize measurements in a simple bar graph.
- Draw and label major tulip plant and flower structures.
- Describe how some plant structures help a plant grow or reproduce.
- Put stages of tulip growth in a reasonable sequence and support an explanation with observations.
Materials Needed
A tulip growing in a school garden or a potted tulipRuler marked in inches (centimeters can be used, too)Science journal or observation sheetPencil and crayons or colored pencilsGraph paper or a blank graph templateOptional: hand lens, craft stick or plant marker, and camera or tabletOptional: tulip life cycle worksheets for sequencing, labeling, matching, drawing, and review
Plan the Lesson: Before, During, and After
Before: Introduce and Predict
Introduce a few useful words: bulb, root, shoot, stem, leaf, bud, flower, and seed. Show students a tulip bulb or a picture of one, then invite them to predict what they may see as a tulip grows.
Ask: What do you think will appear first above the soil? What might change after the leaves grow? Have students record a prediction in their journals. You can show a life cycle model, but leave room for students to test and revise their ideas.
During: Observe, Measure, Sketch, and Record

turn to the same plant on the same day each week when possible. Students can measure from the soil line to the top of the plant, make a quick sketch, and record one detail they notice.
A simple journal entry might include:
- Date: __________
- Height: __________
- What I notice: ______________________________
- What changed since last time? ______________________________
- My prediction for next week: ______________________________
- Sketch:
Remind students to observe carefully and avoid pulling leaves or flowers from the plant. If the tulip is in a garden, a small marker can help the class find the same plant again.
After: Graph, Label, Sequence, and Explain
Once students have several observations, turn the height measurements into a bar graph. Have students label a tulip drawing, sequence the life cycle stages, and compare their original prediction with the evidence they collected.
Close with a short explanation: How did the tulip change? What evidence from your journal or graph supports your answer?
Measure and Graph Tulip Growth
Have students measure the plant in the same way each time. For example, measure from the soil line to the tallest point and record the result in inches. Consistent measuring makes the data easier to compare.
| Week | Date | Tulip height | Observation |
|---|---|---|---|
| 1 | ______ | ______ | __________________ |
| 2 | ______ | ______ | __________________ |
| 3 | ______ | ______ | __________________ |
| 4 | ______ | ______ | __________________ |
| 5 | ______ | ______ | __________________ |
Students can use their measurements to make a bar graph. Then discuss: Which week showed the greatest change? Did the tulip grow by the same amount each week? When did the bud appear? What changed after the flower opened?
For a hands-on alternative, students can mark the tulip’s height on a strip of paper each week, cut the strip to that length, and arrange the dated strips side by side as a class bar graph.
Observe and Draw the Flower Parts
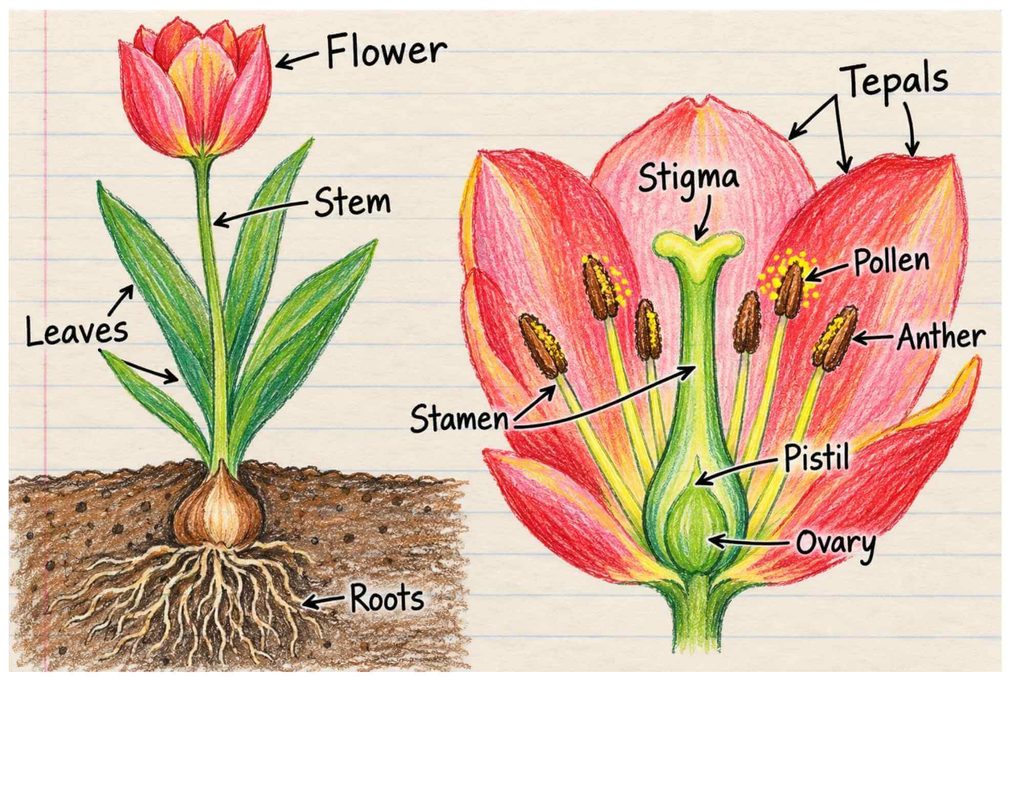
When the tulip blooms, give students time to look closely before labeling a diagram. They can draw what they actually see in a science journal; the goal is careful observation, not artistic perfection.
For a Grade 3 introduction, focus on a few structures and their jobs:
- Roots take in water and help anchor the plant.
- Stem supports the plant and connects its parts.
- Leaves use sunlight to help the plant make food.
- Flower helps the plant reproduce.
- Pollen-producing structures and the central flower structures are involved in making seeds.
If you teach the names of flower parts, introduce stamen and pistil with a clear diagram. The anther on the stamen produces pollen; the stigma at the top of the pistil can receive pollen. The ovary is lower inside the flower. Students do not need to memorize every term at once—the key idea is that different flower structures have different jobs.
Tulips have six similar-looking flower parts often called tepals; these are commonly introduced as three petals and three sepals. For younger students, it is fine to focus on the visible flower and introduce the more precise vocabulary only if it suits your lesson.
Explore the Tulip Life Cycle
A tulip commonly grows from a bulb. The bulb stores food and contains the structures that can grow into a new plant. Roots and a shoot develop, leaves grow, and a flower bud may open into a bloom.
After flowering, the flower may fade. If pollination and fertilization occur, seeds can develop. Tulips can also form new bulbs, which is why gardeners often grow them from bulbs. Growing a tulip from seed takes much longer than watching a bulb sprout, so students can compare these two pathways without expecting to see a seed-grown tulip mature during the investigation.
An age-appropriate model might show bulb → growing plant → flower → seeds and/or new bulbs → a new growing plant. Explain that a model simplifies what happens and that the timing can vary.
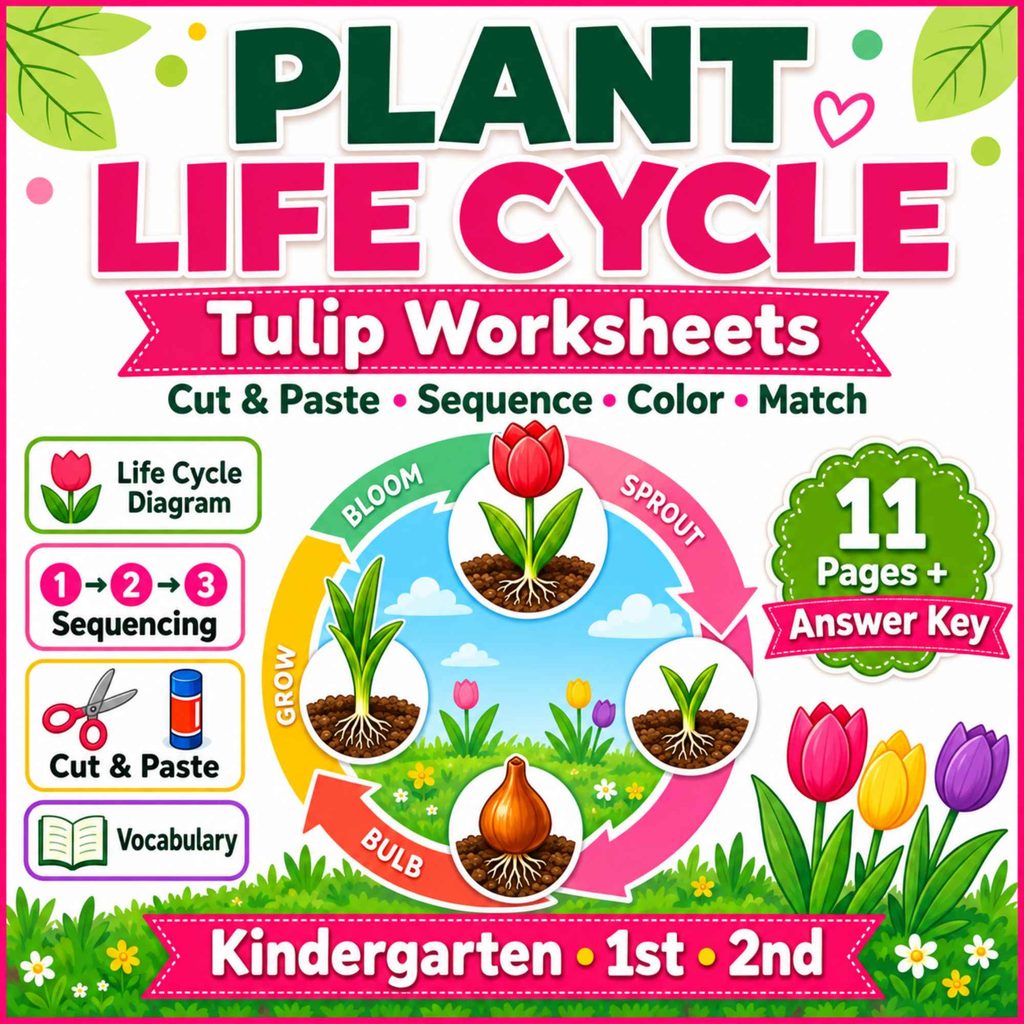
How to Use the Tulip Life Cycle Printable
The printable can reinforce the real-plant investigation and help you build a short mini-unit:
- Introduce the model: Look at the life cycle diagram and name the stages together.
- Sequence: Have students cut and paste the stages in order, then explain one clue they used.
- Label and match: Use the plant-part labeling and matching activities to review vocabulary and functions.
- Draw and describe: Students draw a tulip or a stage of growth and add labels or a short observation sentence.
- Check understanding: Finish with the mini quiz and use the answer key for quick review.
Use the sequencing activity after students have made observations so they can compare the model with a living tulip. The printable also works as a science center, review activity, or a simple follow-up for students who were absent on an observation day.
Science, Math, ELA, and Art Connections
Science: Observe plant growth, identify structures, and model a life cycle.
Math: Measure height, organize data, and interpret a bar graph.
ELA: Use science vocabulary, write predictions, and explain changes with evidence from a journal.
Art: Create a careful observational drawing and label visible details.
Differentiate and Support Students
For students who need more support: Provide a picture word bank, a labeled example, sentence starters such as “I notice…” and “The tulip changed by…,” and a partner for measuring or recording.
For on-level learners: Ask students to keep their own observation records, complete the sequence, label a diagram, and explain a change using evidence.
For students ready for a challenge: Compare how a tulip grows from a bulb with how a plant grows from a seed. Ask students to explain the role of several structures or compare two tulips while discussing how differences in light, water, or starting size could affect the observations.
Quick Teacher Tips
- Use a potted tulip if you do not have a school garden.
- Measure on the same day each week and use the same measuring method.
- Take a weekly photo from a similar angle to help students compare changes.
- Leave enough time: the tulip’s growth and flowering schedule depends on the plant and conditions.
- Let students compare the real tulip with the printable life cycle model.
- After flowering, avoid cutting the leaves back while they are still green; they help the bulb store energy for future growth
Simple Assessment Ideas
Look at students’ journals, graphs, drawings, labels, and sequencing pages. A short exit ticket can check the main ideas:
- Name two parts of a tulip plant.
- What does a bulb do for a tulip?
- What is one job of a flower?
- Describe one change you observed and name the evidence that helped you notice it.
Students can also compare their first and final journal entries and write one sentence about how their thinking changed.
Present : free coloring pages:


Make Spring Science Observable
A tulip investigation helps students connect a model to evidence from a living plant. As they observe, measure, graph, draw, and explain, they practice the habits of young scientists while strengthening their understanding of plant growth and life cycles.
References
- Next Generation Science Standards: 3-LS1-1 — From Molecules to Organisms: Structures and Processes
- Common Core State Standards for Mathematics: 3.MD.B.3 — Represent and Interpret Data
- University of Illinois Extension: Great Plant Escape — Flower Parts
- United States Botanic Garden: Flower to Seed, Seed to Flower — K–2 Lesson Plan
- University of Illinois Extension: Bulbs
- University of Illinois Extension: Caring for Spring-Blooming Bulbs After Flowering
- University of Minnesota Pressbooks: Seed Plants — Angiosperms
FAQ
The investigation is designed with Grade 3 students in mind. You can simplify the observation and vocabulary for younger students or add more detailed flower-part explanations for older elementary learners.
Yes. A potted tulip works well indoors. If tulips are not blooming during your lesson, use weekly photographs alongside the life cycle model so students can still compare the stages.
Once a week is a manageable schedule. Measure from the soil line to the top of the plant each time, using the same method, and record the date and height.
Start with roots, stem, leaves, and flower. If your class is ready, introduce the stamen, anther, pollen, pistil, stigma, and ovary as flower structures involved in reproduction. Students do not need to memorize every term at once.
Garden tulips are usually grown from bulbs. A pollinated flower can produce seeds, but seed-grown tulips may take several years to bloom. Tulip bulbs can also form new, smaller bulbs.
The life cycle modeling and observation parts can support NGSS 3-LS1-1. Measuring and graphing the tulip’s growth also creates a useful connection to elementary math.
Extend the Plant Life Cycle Learning
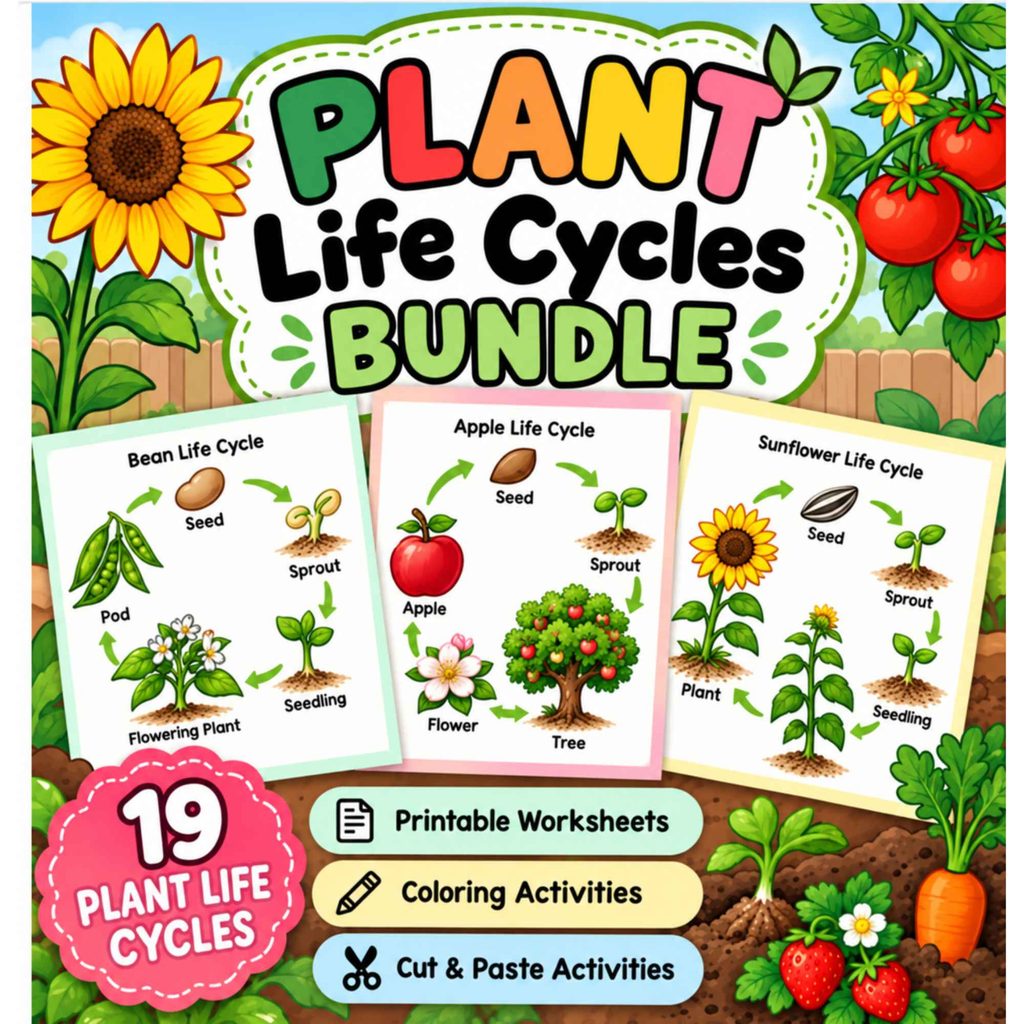
Looking for more ways to help students explore how plants grow and change? The Plant Life Cycle Mega Bundle includes 19 plant life cycle resources and 223 pages for Kindergarten through Grade 2, including a tulip life cycle set. Depending on the resource, activities may include sequencing, labeling, matching, drawing, writing, coloring, and mini quizzes.
Although designed for K–2, selected pages can also provide review or extra practice during a Grade 3 spring science unit. An answer key is included.
[Explore the Plant Life Cycle Bundle on TPT] https://www.teacherspayteachers.com/Product/Plant-Life-Cycle-Worksheet-Activities-Life-Cycle-of-a-Plant-Bundle-16050007
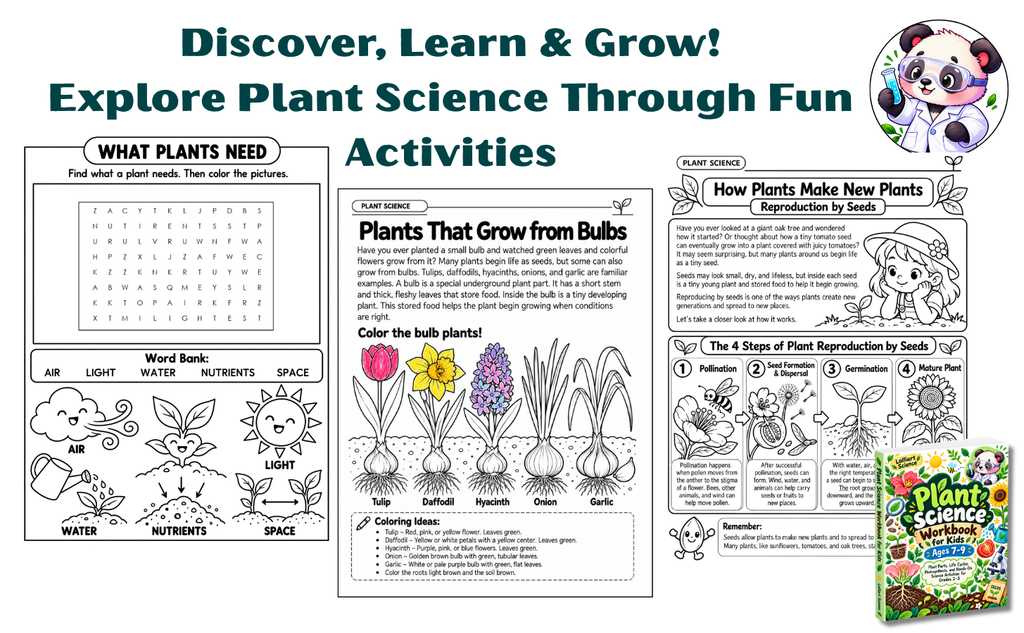
Turn science learning into an exciting adventure! Designed for children ages 7–9 (Grades 2–3), this workbook combines engaging reading passages, illustrated worksheets, multiple-choice questions, and fun puzzles. Explore how fruits protect seeds, discover how leaves make food, and strengthen science knowledge through playful, hands-on learning.