Bread Mold Experiment for Kids: A Simple 5-Day Science Activity
Are you looking for a science experiment that is simple to prepare but still gives young learners plenty to observe, discuss, and record?
A bread mold experiment is an engaging way to introduce children to fungi, decomposition, food safety, and the scientific method. Using just a few familiar materials, students can investigate how moisture and other environmental conditions affect mold growth.
This hands-on activity works especially well for Kindergarten, 1st grade, and 2nd grade. Students can make predictions, observe changes over several days, draw what they see, and compare their results.
The basic investigation compares a dry slice of bread with a moist slice and asks students to observe what happens after approximately five days. The accompanying resource includes setup directions, prediction activities, observation pages, and a conclusion section.
What Do Children Learn from a Bread Mold Experiment?
This activity is about much more than watching bread change.

Students practice several important science skills:
- Making a prediction before an investigation
- Following a simple experimental procedure
- Observing carefully over time
- Recording changes with words and pictures
- Comparing two different conditions
- Identifying patterns in their results
- Drawing a conclusion from evidence
The experiment also introduces the idea that living things need certain conditions to grow. Mold generally grows well when it has access to food, moisture, air, and a suitable temperature.
Because mold growth does not always happen at exactly the same speed, children also learn an important science lesson: real experiments may produce slightly different results.
Materials for the Experiment
You only need a few simple materials:
- Two slices of bread
- Water
- A dropper or spoon
- Two clear, sealable bags or transparent containers
- Labels or a permanent marker
- Gloves for the adult preparing the experiment
- Observation worksheets
- A pencil and crayons
The printable pack includes a child-friendly materials checklist and illustrated setup instructions to help younger learners follow the process.
Important Mold Safety Rules
Mold should always be treated as a look-but-do-not-touch investigation.
Once the bread has been placed inside a sealed bag or container, keep it closed for the entire experiment. Children should never touch, smell, or taste the moldy bread.
Use these classroom safety rules:
- An adult should prepare and seal the bread samples.
- Keep each sample in a tightly closed, transparent bag or container.
- Do not open the samples after mold appears.
- Observe the bread through the clear container.
- Throw away the entire sealed container or bag at the end of the experiment.
- Wash hands after handling the outside of the containers.
These precautions allow children to observe mold safely without direct contact. The resource also includes pages about moldy-food safety, helpful and harmful molds, and why mold may extend below the visible surface of food.
How to Set Up the Dry vs. Wet Bread Experiment

Step 1: Prepare the dry bread
Place one slice of bread into a clear bag or transparent container.
Label it:
DRY
Do not add water to this slice.
Step 2: Prepare the wet bread
Place the second slice of bread into another clear bag or container.
Add a small amount of water. The bread should be slightly damp, not completely soaked.
Label it:
WET
Step 3: Seal the samples
Seal both bags or containers securely.
Place them next to each other so they receive similar amounts of light and warmth. The only major difference should be the amount of moisture
How does temperature affect mold growth on bread?
Independent variable: Temperature
Dependent variable: Amount or rate of mold growth
Controlled variables: Type and size of bread, moisture, container, observation time, and amount of light
- Place equal pieces of the same bread in separate sealed bags.
- Keep one in a cooler location, one at room temperature, and one in a warmer location.
- Keep all other conditions as similar as possible.
- Observe the bread without opening the bags.
- Record changes over several days.
- Compare the amount of visible mold.
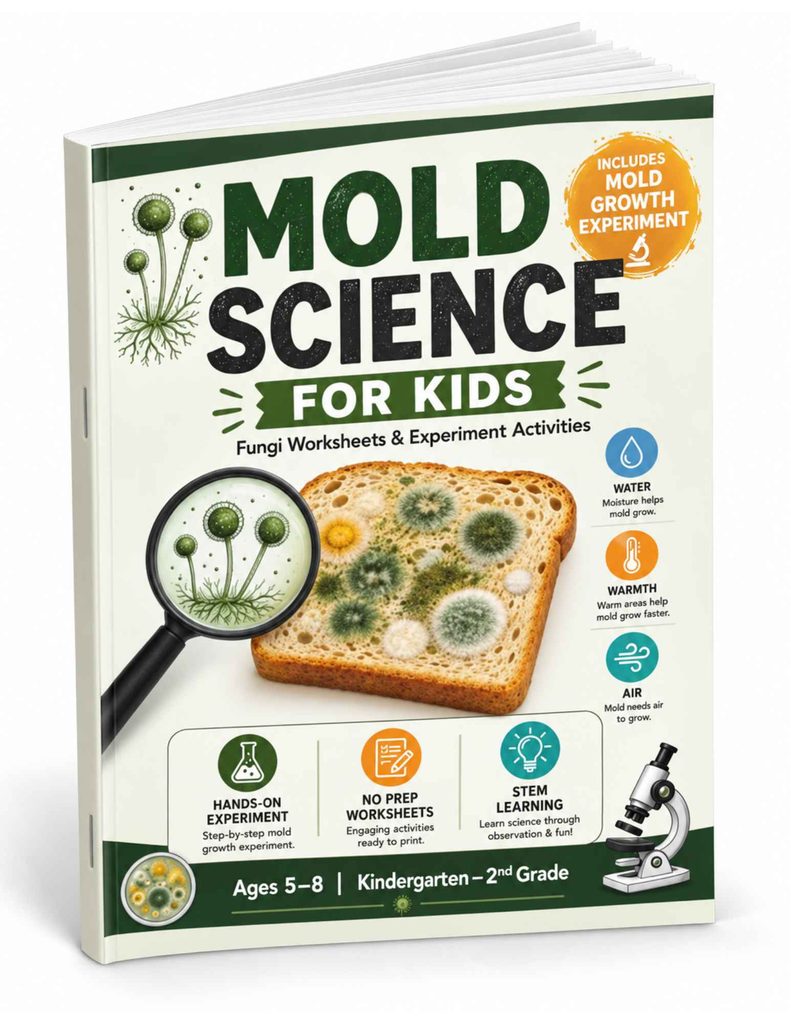
Prefer a Printed Version?
Bring mold science to life with our Mold Science for Kids paperback workbook! Enjoy 35 pages of hands-on experiments, fun science activities, and engaging worksheets for young learners.
.
Step 4: Make a prediction
Before any mold appears, ask students:
- Which slice do you think will grow mold first?
- Which slice will have more mold?
- Why do you think moisture might make a difference?
- What do you think the bread will look like after five days?
Students can circle their prediction and draw what they think will happen.
Step 5: Observe the bread each day
Observe the samples without opening them.
Students may record:
- The day mold first appeared
- The number or size of mold spots
- The colors they notice
- Changes in the bread’s texture or appearance
- Differences between the dry and wet samples
The workbook provides both short five-day observations and extended recording pages covering up to twelve days.
What Results Should You Expect?
The moist bread will often develop visible mold sooner or show more mold than the dry bread because moisture supports mold growth.
However, results can vary depending on:
- The type of bread
- Preservatives in the bread
- Room temperature
- Humidity
- The number of mold spores already present
- How much water was added
This variability creates a useful discussion opportunity. Students can compare their prediction with what actually happened and explain their conclusion using evidence from their observations.
Instead of simply telling children the answer, encourage them to complete a sentence such as:
“The wet bread grew more mold because…”or: “Our results were different from my prediction because…”
Try More Bread Mold Investigations
Once students understand the basic dry-versus-wet experiment, they can investigate another variable.
The printable resource includes extension activities comparing:
- Light and darkness
- Warm and cold locations
- Different types of bread
- Different kinds of food
- Warm and damp, cold and damp, warm and dry, or hot and damp conditions
It also includes a mold terrarium activity and math-based recording pages for counting and comparing mold spots.
Remember to change only one variable at a time. For example, when comparing light and dark locations, use the same type of bread and the same amount of water in both samples.
This helps children understand what makes an experiment fair.
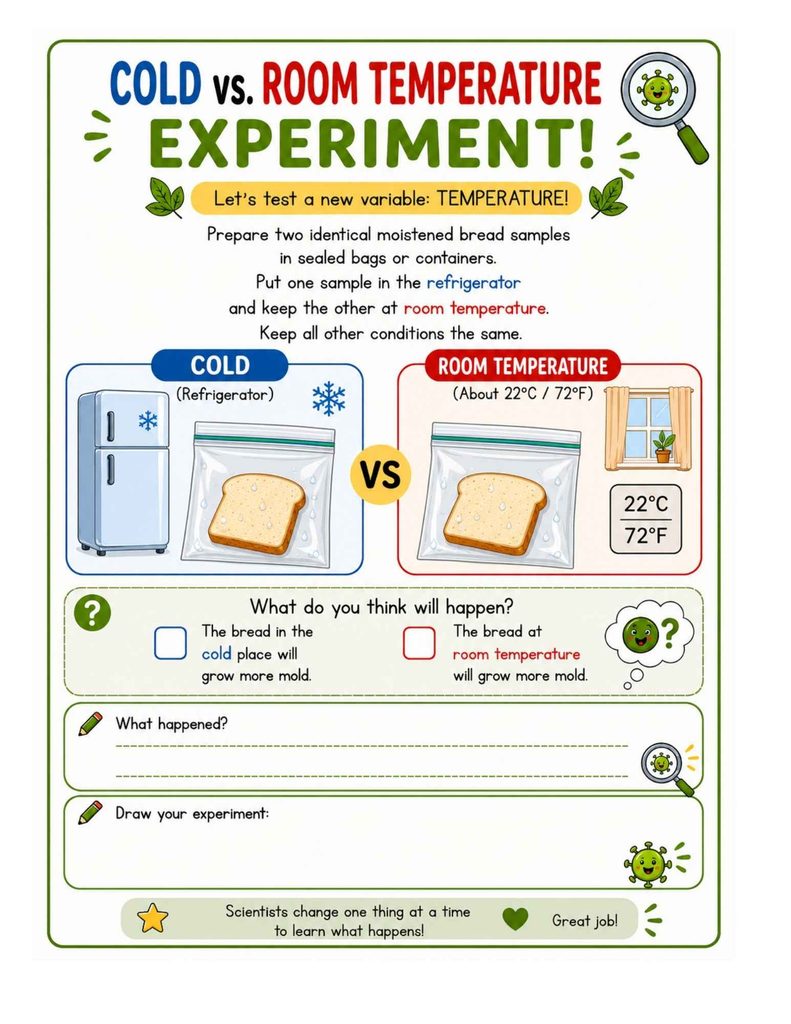
How to Set Up a Controlled Bread Mold Experiment at Different Temperatures
How does temperature affect mold growth on bread?
Independent variable: Temperature
Dependent variable: Amount or rate of mold growth
Controlled variables: Type and size of bread, moisture, container, observation time, and amount of light
- Place equal pieces of the same bread in separate sealed bags.
- Keep one in a cooler location, one at room temperature, and one in a warmer location.
- Keep all other conditions as similar as possible.
- Observe the bread without opening the bags.
- Record changes over several days.
- Compare the amount of visible mold.
Simple Mold Science for Young Learners
Mold is a type of fungus.
Fungi are living organisms, but they are not plants or animals. The fungi group includes:
- Mold
- Yeast
- Mushrooms
Mold grows in thin, thread-like structures called hyphae. Some molds form structures called sporangia, which produce tiny spores. The spores can travel and allow mold to grow in new places.
The learning pack introduces fungi, compares yeast and mold, and provides illustrated activities for identifying spores, hyphae, and sporangia.
For younger children, you can explain it this way:
Mold is a living fungus that grows on food and other surfaces. It spreads using tiny spores that are too small for us to see clearly without special tools.
Is All Mold Harmful?
Not every type of mold is harmful.
Some molds are used to make foods such as certain cheeses, and molds have also played a role in producing medicines. Other molds spoil food or may make people sick.
Children do not need to identify the type of mold growing on their bread. The safest rule is simple:
Never eat food that has unexpected mold growing on it.
The worksheets help students distinguish between helpful uses of mold and unsafe mold growing on ordinary food.

Using the Experiment in the Classroom
This activity can be used in several ways:
- As a whole-class science demonstration
- In a science center
- During a fungi or decomposition unit
- As part of a food safety lesson
- For homeschool science
- As a week-long observation project
- As an introduction to variables and fair testing
- For morning work connected to an ongoing experiment
Teachers can prepare the samples in advance and let students complete the prediction page on the first day. During the following days, students can observe the sealed samples and update their recording sheets.
At the end of the investigation, the class can create a shared results chart and discuss whether the evidence supported their original predictions.
Printable Mold Growth Experiment Worksheets
The Mold Growth Experiment Worksheets and Bread Mold Science Activity provide the structure children need to complete the investigation successfully.
- Illustrated experiment directions
- Materials and setup pages
- Prediction worksheets
- Daily observation pages
- Drawing and recording activities
- Results and conclusion pages
- Dry-versus-wet comparisons
- Light-versus-dark investigations
- Warm-versus-cold investigations
- Different bread and food comparisons
- Mold safety activities
- Helpful and harmful mold lessons
- Fungi, yeast, and mushroom activities
- Parts-of-mold labeling pages
- Science extension and math activities

To place mold growth in a broader science context, explore Teaching Microorganisms and Decomposers in Grade 5 and help students discover how fungi, bacteria, and other microbes affect ecosystems and matter cycling.https://lolliartscience.com/2026/08/20/microorganisms-decomposers-grade-5/
The pages are designed for young learners, with clear directions, visual supports, checkboxes, drawing spaces, and short writing prompts.
Frequently Asked Questions About the Bread Mold Experiment
Visible mold may begin to appear within three to seven days, but the timing can vary. Bread containing preservatives may take longer to grow mold, so you may need to continue the observation period for up to 10–12 days.
Slightly damp bread will often develop visible mold sooner than dry bread because mold grows well in moist environments. However, temperature, humidity, bread type, and preservatives can all affect the results.
Add only enough water to make the bread slightly damp. The slice should not be completely soaked. Using a dropper or small spoon makes it easier to control the amount of water.
Keep both samples sealed and continue observing them for several more days. Some breads contain preservatives that slow mold growth. A cooler room or low humidity may also delay visible changes.
Yes, when it is conducted as a sealed, look-but-do-not-touch investigation. An adult should prepare and seal the samples. Children should observe the bread through the clear bag or container without opening, touching, smelling, or tasting it.
No. Once the experiment begins, the bag or container should remain securely sealed. Mold spores may spread through the air when a sample is opened. At the end of the experiment, an adult should dispose of the entire sealed bag or container.
This bread mold experiment is especially suitable for Kindergarten, 1st grade, and 2nd grade. Younger students can record their observations with drawings, while older students can write descriptions, compare variables, and explain their conclusions using evidence.
Change only one condition at a time. For a dry-versus-wet investigation, use the same type and size of bread, place the samples in similar locations, and observe them for the same amount of time. Moisture should be the only major difference.
The activity introduces fungi, mold growth, decomposition, moisture, food safety, variables, and fair testing. It also helps children practice predicting, observing, recording results, comparing evidence, and drawing conclusions.
Mold growth is affected by many factors, including room temperature, humidity, bread ingredients, preservatives, the amount of water added, and the mold spores already present. Different results are a normal part of scientific investigation and provide an opportunity for students to discuss possible explanations.
Hi, this is a comment.
To get started with moderating, editing, and deleting comments, please visit the Comments screen in the dashboard.
Commenter avatars come from Gravatar.