With free Ocean detective worksheet
Sharks have an instant advantage in the elementary classroom: students are usually interested before the lesson even begins. But shark images do not have to be limited to bulletin boards, coloring pages, or a Shark Week activity.
A set of realistic shark images can become a useful science tool for observation, classification, habitats, adaptations, anatomy, and evidence-based thinking. For students in Grades 2–4, especially, realistic images give them something concrete to examine as they begin asking an important scientific question:
Why does this animal look the way it does?
Photorealistic shark images work especially well because students can compare visible characteristics such as body shape, coloration, fins, mouths, tails, and unusual structures rather than relying only on simplified cartoon representations.

1. Start With Observation: What Do You Notice?
Before giving students facts about a shark species, show them the image.
Ask:
What do you notice? What do you wonder?
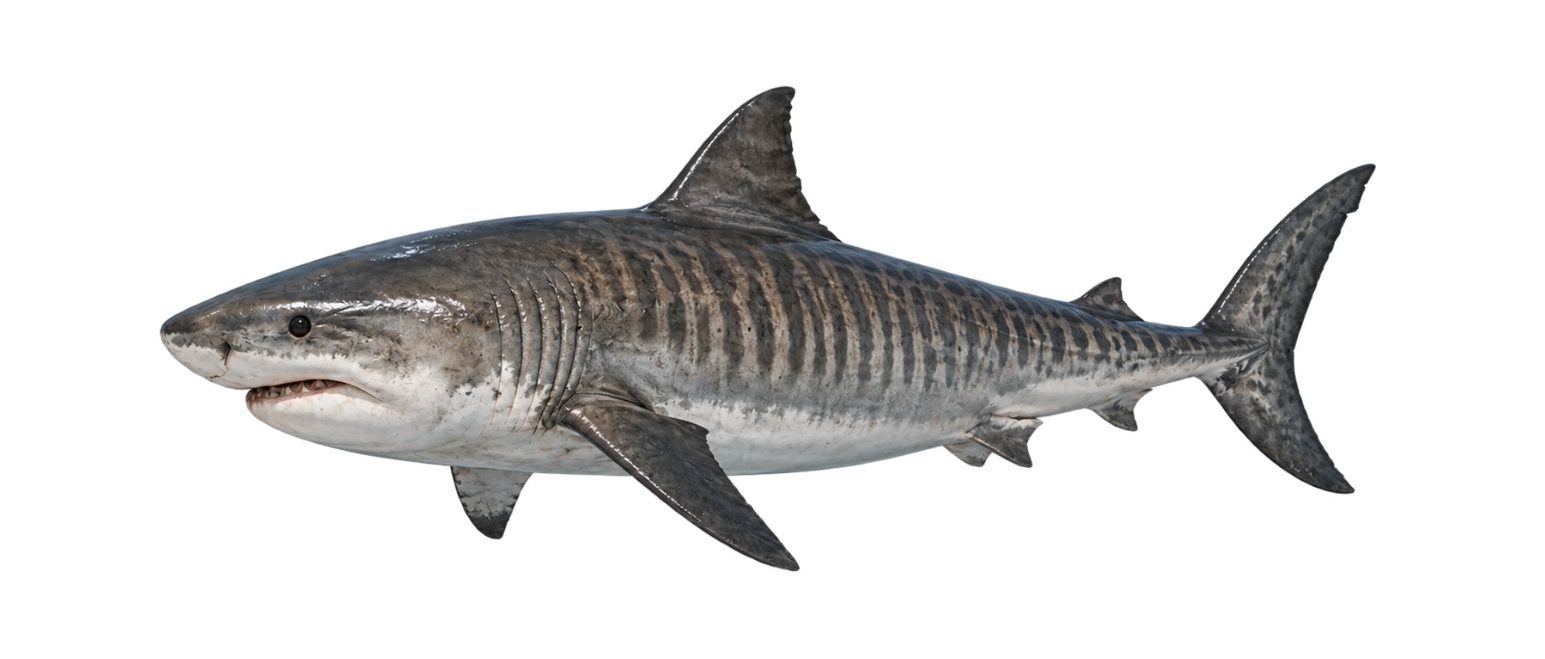
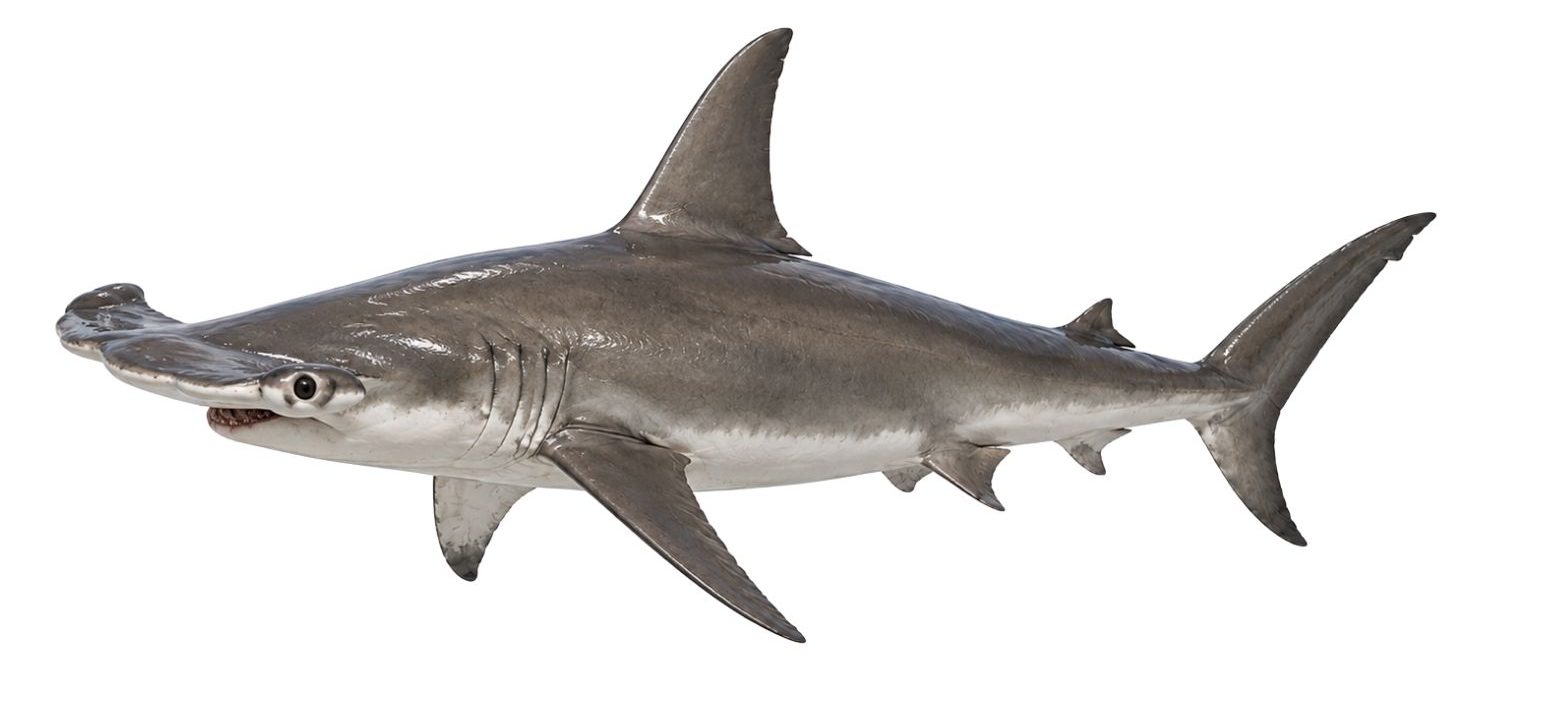
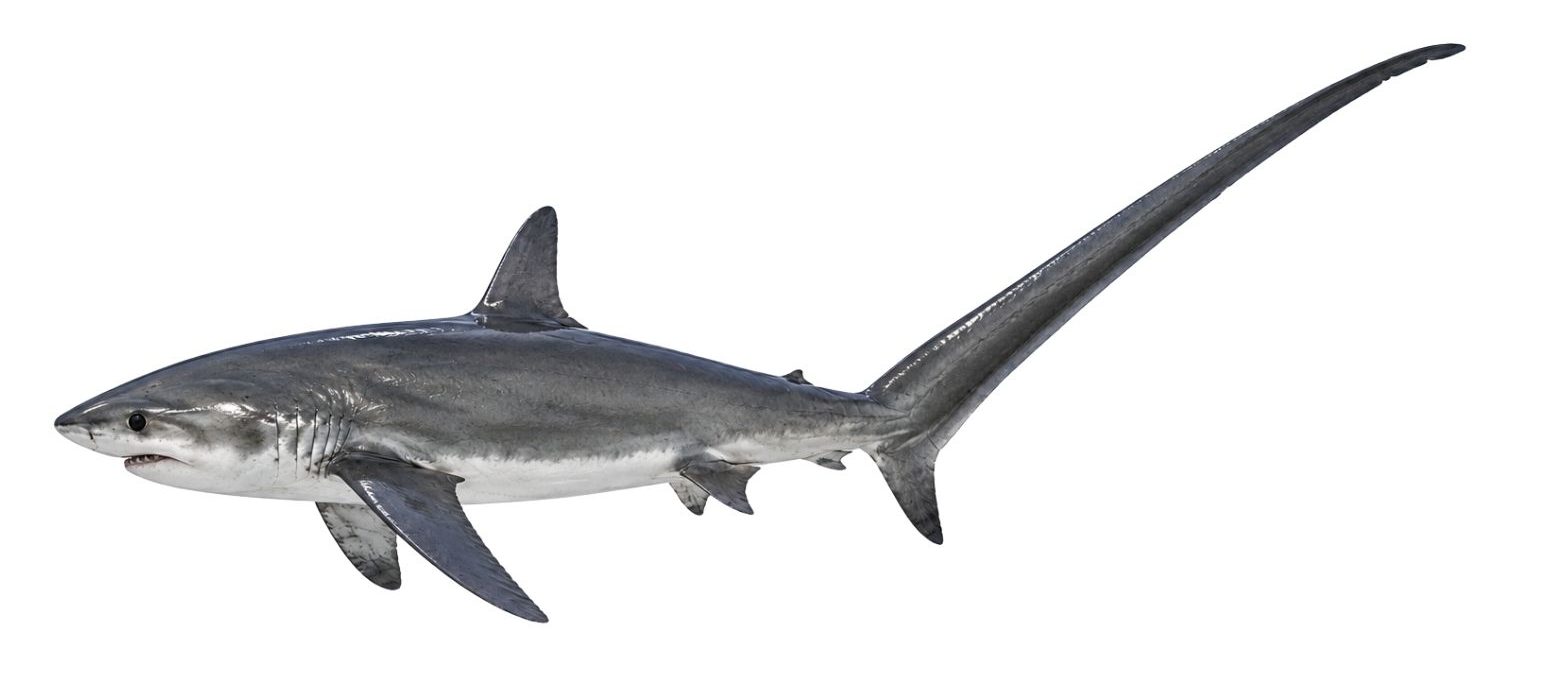
A tiger shark may have visible stripes. A whale shark is covered in spots. A hammerhead has an unmistakably wide head. A thresher shark has an extraordinarily long upper tail fin.
Students can record visible evidence first, before trying to explain what each feature might do.
This simple approach helps separate observation from inference.
For example:
“The shark has a very long tail.”
is an observation.
“The shark probably uses its tail to catch food.”
is an inference that students can later investigate.
This makes shark images useful for much more than species identification.
2. Compare Shark Adaptations
Sharks are particularly useful for introducing the idea that animals have structures that help them survive.
Instead of studying one generic shark, let students compare species with dramatically different body forms.
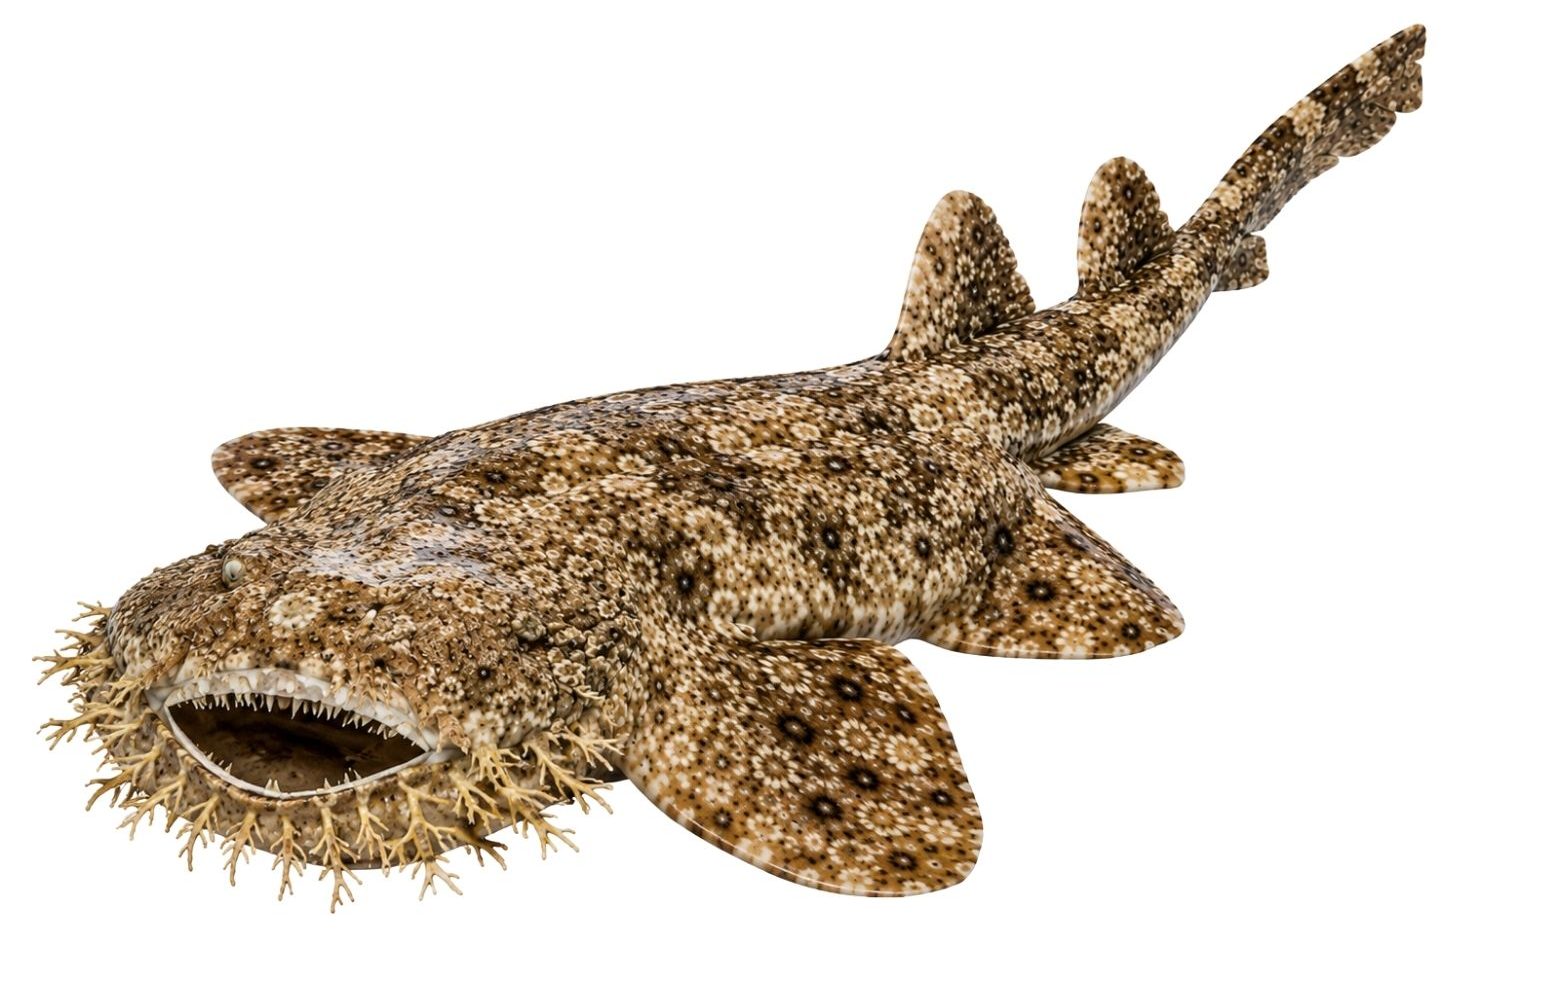
A thresher shark has a long tail that can help stun schooling fish. A great hammerhead has a broad, hammer-shaped head that supports its sensory abilities while searching for prey. A wobbegong has a flattened body, patterned skin, and skin flaps that help it blend into the seafloor.
Even young students can begin making connections between structure and function:
What is unusual about this structure?
How might it help the shark move, feed, hide, or survive?
For Grade 4, this kind of comparison can support learning connected to NGSS 4-LS1-1, which focuses on internal and external structures that support survival, growth, behavior, and reproduction.

3. Sort Sharks by Visible Characteristics
Classification does not need to begin with complicated taxonomy.
For younger elementary students, start with characteristics they can actually see.
Students might sort shark cards by:
- body pattern: striped, spotted, or mostly solid-colored;
- body shape: streamlined, flattened, wide-headed, or eel-like;
- feeding clues: large filtering mouth versus visible grasping teeth;
- habitat clues: open-water swimmer versus bottom-dwelling body form.
The goal is not necessarily to find one “correct” grouping. Instead, students should explain what rule they used.
For example:
“We put the tiger shark and zebra shark together because both have visible body patterns.”
Another group may sort the same cards differently.
That discussion is part of the science.
The original activity concept specifically suggests sorting by size, pattern, and body form and using shark images as visual data.
4. Match Sharks to Ocean Habitats
Not every shark lives in the same kind of environment.
Create a simple habitat board with areas such as:
coral reef — open ocean — seafloor — deep sea
Then ask students to place shark cards where they think each animal might belong.
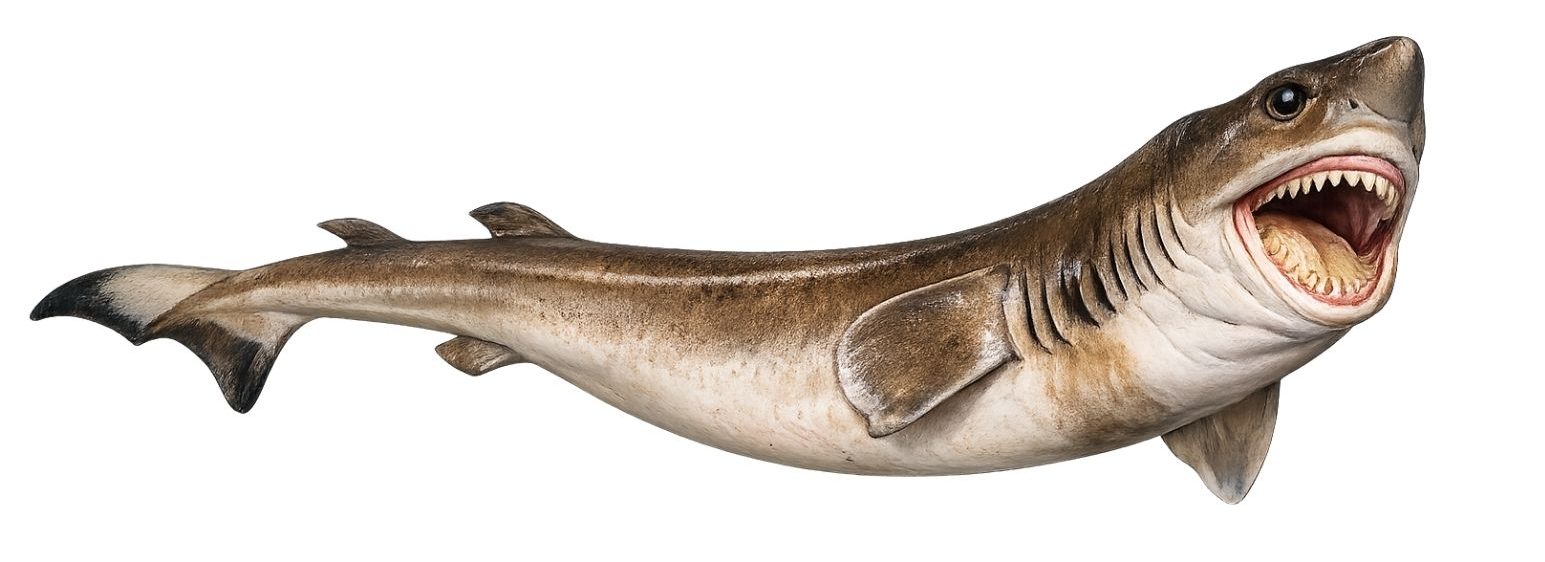
A flattened, patterned wobbegong provides visual clues that it may spend time near the seafloor. A streamlined blue shark looks much better suited to swimming through open water. Deep-sea species such as the goblin shark or frilled shark can introduce environments far below the sunlit surface.
The most important part comes after the sorting:
What evidence from the shark helped you make your decision?
Students may discover that appearance alone cannot answer every habitat question. That is useful too—it creates a natural reason to consult a book, fact card, or trusted science source.


5. Investigate Camouflage and Countershading
Shark coloration provides an accessible introduction to camouflage.
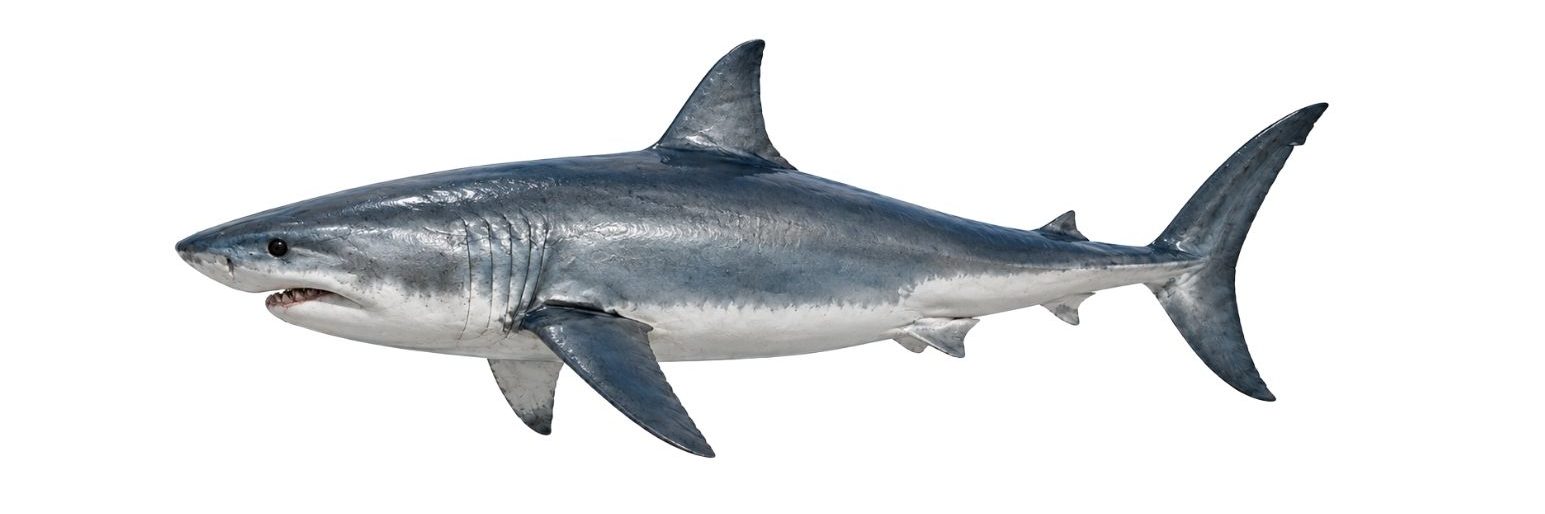
Many open-water sharks have darker coloration above and a lighter underside, a pattern known as countershading. Students can observe the pattern and discuss why being dark on one side and light on the other might make an animal harder to see in the ocean.
Other sharks use very different camouflage strategies.
A tasselled wobbegong, for example, can blend into reefs and the seafloor using its mottled coloration and unusual outline. Patterned sharks also create opportunities to compare stripes, spots, and other markings.
A useful classroom question is:
Does every shark use camouflage in the same way?
That immediately shifts the activity from simply naming sharks to comparing adaptations.
6. Build a Shark Anatomy Investigation
By Grade 4, students can use a realistic shark image as a simple anatomy model.
Choose a clear side-view image and have students identify visible structures such as the dorsal fin, pectoral fins, tail fin, mouth, eyes, and gill slits.
Then move beyond labeling.
Ask what each structure helps the animal do.
The tail contributes to propulsion. Fins help with movement and stability. Gills allow sharks to obtain oxygen from water. A streamlined body reduces resistance as the animal moves through the ocean.
The source material proposes exactly this type of image-based anatomy investigation for Grade 4, using realistic images to locate external structures and connect them with function.


The goblin shark is a rare deep-sea shark with a long, flat snout. Its jaws can quickly extend forward to catch prey. It usually lives hundreds of meters below the ocean surface.


7. Turn It Into a “Shark Detective” Investigation
One of the easiest ways to bring all of these ideas together is a Shark Detective activity.
Give each student or pair a different shark image without immediately telling them everything about the species.
Students first examine the visual evidence. They describe coloration, patterns, body shape, fins, tail, head, and any unusual structures.
Next, they make predictions:
Where might this shark live?
How might it move?
What might it eat?
Which body feature could help it survive?
Finally, students research the species and compare their predictions with what they discover.
The original “Shark Detective” concept combines observation, adaptation reasoning, habitat research, size, scientific names, and a final interesting fact, making it particularly suitable as a short science-and-writing project.
Students can even display their finished pages together to create a classroom Shark Encyclopedia.
Why Realistic Shark Images Matter
There is nothing wrong with cute shark illustrations, especially for younger learners. But when the learning goal is scientific observation, realistic images offer something different.
Students can notice the huge mouth of a basking shark, the extraordinary tail of a thresher shark, the flattened body of a wobbegong, the stripes of a tiger shark, or the unusual head of a hammerhead.
Those differences become evidence.
And that is where an image stops being classroom decoration and starts becoming a science resource.
For Grades 2–4, shark images can provide a surprisingly rich starting point for teaching students to observe carefully, compare organisms, recognize patterns, connect structures with functions, and support ideas with evidence.
Sometimes the best science lesson begins with a very simple question:
“What do you notice about this shark?”